
Home › Guides › Solar installation day: exactly what happens, hour by hour
SolarSolar installation day: exactly what happens, hour by hour
Most homeowners fear installation day more than the decision itself: strangers on the roof, holes in the tiles, the power going off. The reality of a well run domestic retrofit is quieter than that. Scaffold goes up a day or two before, the crew is on site for one to two days, the power goes off briefly and by arrangement, and the whole thing finishes with an hour of handover. This guide walks through what an MCS-certified installation team for your area actually does, hour by hour, so you know what good looks like while it is happening on your own roof.
Updated 27 August 2026 · written by the Clearline guidance team
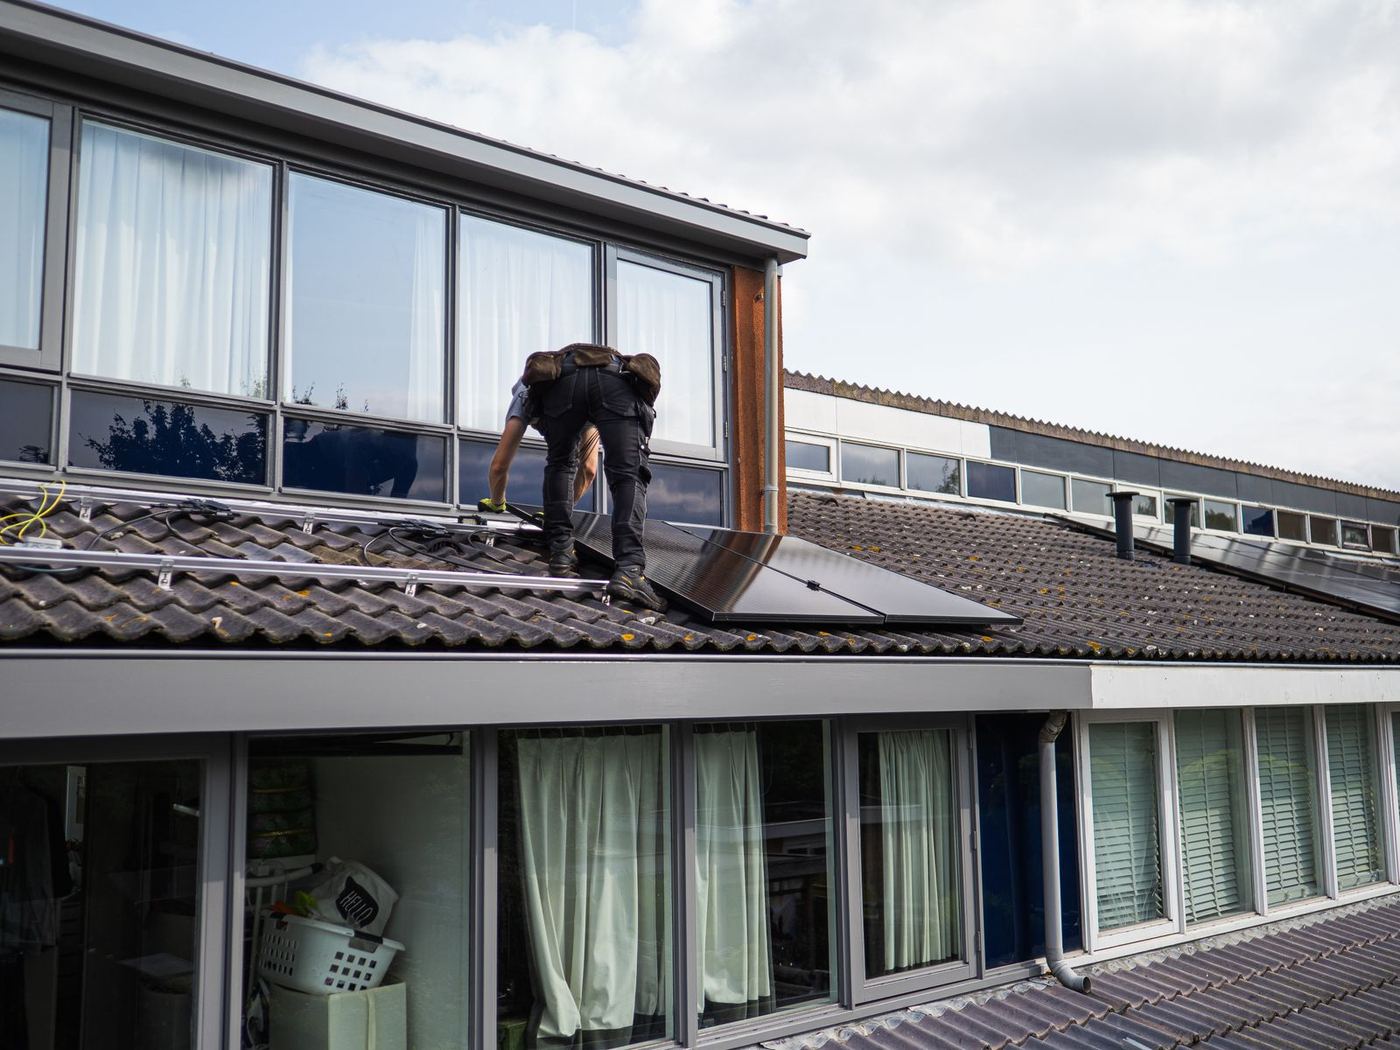
The decision to fit solar takes weeks. The installation takes one to two days. That gap surprises people, and so does how contained the disruption is: scaffold up a day or two before, a crew of roughly three on site, one short planned power cut, an hour of handover at the end. Clearline does not install anything; the work described here is what the MCS-certified installation team for your area actually does on a domestic retrofit. Knowing the sequence matters, because a homeowner who knows what good looks like can spot corner cutting while there is still time to challenge it.
The week before: scaffold, paperwork and kit
The paperwork is settled before anyone touches your roof. If the inverter is rated at 3.68kW per phase or less, the connection falls under G98: the installation team fits first and notifies your DNO within 28 days of commissioning, so nothing holds up the date. Larger systems need G99 approval in hand before installation, which typically takes 4 to 8 weeks, and an installation team that books your install before that approval exists is gambling with your deposit. The mechanics are in our G98 vs G99 guide; the point for install week is that this is entirely the installation team's job, and it should already be done.
Scaffolding goes up a day or two ahead of the crew, usually by a separate scaffold firm. For a solar job it typically costs £300 to £1,000 or more, around 13 per cent of the total install cost, and it should already be inside your quoted price rather than appearing as an extra. Expect it to stay up around two weeks in total, because the scaffolder collects it after the install rather than the same afternoon. The kit itself, panels, rails, inverter and any battery, arrives either with the scaffold or on the morning of the job, so leave space for a delivery and a works van.

Installation day, hour by hour
A typical domestic crew is a roofer plus two electricians, and most retrofits are finished within one to two days on site. A single aspect roof with eight to twelve panels is often one long day; two roof faces, a battery, or tricky cable routes push it into a second morning. The sequence below is a typical single day, and on a two day job the split usually falls between the roof work and the electrical work.
08:00, arrival and walk through
The crew confirms the design against the survey: panel layout, inverter and battery positions, cable routes, where the scaffold ladders land. This is your ten minutes. Agree where dust sheets go, which doors they will use, and roughly when the power will need to go off.
Morning: roof anchors and rails
The roofer lifts individual tiles, fixes anchor brackets to the rafters beneath, then re-seats the tiles over the bracket arms. Aluminium rails bolt to the anchors and are levelled and torqued. No panel touches the roof until the rail grid is straight, because every cosmetic sin visible from the street starts here.
Late morning: panels up and clamped
Panels come up the scaffold one at a time and clamp to the rails. Each one is plugged into its neighbour as it lands, building the string wiring as the array grows. On a common ten panel design using 530W modules, that is about 5.3kWp going on between mid morning and lunch.
Midday: the DC runs
The string cables route from the roof into the building, usually through the eaves and loft, clipped and protected rather than draped over tiles. A DC isolator goes in near the inverter position so the array can be safely disconnected for any future work.
Early afternoon: inverter and battery on the wall
The inverter mounts in the agreed spot, a garage, utility room or ventilated loft, with the battery alongside if one is in the design. Both are heavy, wall structure matters, and a neat installation here is the difference between a plant room and a spaghetti cupboard.
Late afternoon: the AC connection
The electricians isolate your supply and connect the new solar circuit into the consumer unit, with its own protective device and a labelled AC isolator. This is the planned power cut, agreed with you earlier in the day. Once the supply is back on, the system can see the grid.
End of day: commissioning and handover
The array is energised and tested: string voltages and currents against the design, insulation resistance, earth continuity, inverter settings for G98 or G99 compliance. Then the handover hour: monitoring app on your phone, isolator locations, shutdown procedure, and what paperwork follows. Do not skip it.

What the day needs from you
- Access, sorted the night before. Side gates open, the loft hatch clear with a metre of space around it, and the wall where the inverter and battery are going emptied.
- Parking. A works van and a kit delivery both need to get close. If parking is permit controlled or tight, warn the installation team in advance.
- Your wifi details. The inverter's monitoring needs your network name and password at commissioning. Have them written down; hunting for a router password at 4pm delays handover.
- A window for the power cut. If you work from home or have medical equipment that needs power, say so at the morning walk through so the AC connection is timed around you.
- An hour at the end. Handover is where you learn the shutdown procedure and get the app working. Be there for it, even if you were out all day.
What good workmanship looks like
You cannot inspect rafter fixings from the ground, but plenty of quality is visible before the scaffold comes down, and the time to raise it is while the crew is still on site.
- Tidy DC management. Cables on the roof clipped to rails or panel frames, not resting on tiles where they chafe and sit in water. Loft runs clipped, not coiled on the insulation.
- Labelled isolators. A DC isolator near the inverter and a labelled AC isolator by the consumer unit, so any electrician who visits in ten years can make the system safe without guesswork.
- Intact, seated tiles. No cracked tiles left in place, no brackets grinding on tile edges, and any penetration through the roof or wall properly sealed and weathered, not filled with a bead of mastic and hope.
- A ventilated inverter position. Inverters shed heat, and heat shortens their lives. A unit boxed into a sealed cupboard is a future fault, and our inverter lifespan guide explains why.
- Recorded test results. Commissioning readings written down and given to you, not just a thumbs up. They belong in your handover pack.
On kit, the packages the installation team installs are built around named hardware at published prices: LONGi Hi-MO X10 530W panels at £1,000 per kWp installed, with the Tesla Powerwall 3 from £6,350 installed where a battery is in the design, both at 0% VAT until 31 March 2027. A battery adds wall mounting and an extra commissioning step but rarely a whole extra day.

- Rated power
- 530 W
- Module efficiency
- 23.5 per cent at standard test conditions
- Cell technology
- HPBC 2.0, n-type wafer, busbar-free

- Usable energy
- 13.5 kWh
- Solar inverter
- Integrated, 3 MPPTs
- Max solar input
- 20 kW STC
The paperwork that must arrive after
| Document | What it is | When it should arrive |
|---|---|---|
| MCS certificate | Proof the installation meets the MCS standard; required to register for SEG export payments | Within 10 working days of commissioning |
| Electrical Installation Certificate | The electrician's certification of the new circuit and its test results | At handover or shortly after |
| DNO notification or approval | G98 notification filed within 28 days of commissioning, or the G99 approval that predates the install | Confirmation with your handover pack |
| Handover pack and warranties | Panel, inverter and battery warranty terms, workmanship warranty, commissioning readings, user guides | On the day or with the certificate |
Dates per MCS, Sunsave and our G98 vs G99 guide, read 28 August 2026. Diarise the two week mark and chase anything missing.
The MCS certificate is the one that gates your money: no certificate, no SEG registration, no export payments. It also only exists if the business that installed your system was genuinely MCS certified, which is checkable in the public directory before you sign anything, as our installation team checking guide walks through.

Red flags, on the day and after
- No scaffold on a two storey roof. Working from ladders on a domestic solar job is a safety and quality shortcut in one.
- A G99 job booked with no approval. If the design is over 3.68kW per phase and the installation team cannot show the DNO's approval, the date should move, not the paperwork.
- Cracked tiles left behind. Tiles break during solar work; that is normal. Leaving them broken under the array is not.
- No commissioning results offered. An installation team reluctant to hand over test readings is telling you how much testing happened.
- Paperwork that never lands. An MCS certificate still missing weeks after commissioning blocks your export payments and is worth escalating in writing, first to the installation team, then to their certification body.
If you want to know what your own installation would involve before anyone quotes for it, a free remote design call maps your roof, sizing and likely install scope from satellite imagery and your bills. It is a video call, not a home visit, and there is no obligation at the end of it.
Get your free quote →Installation day questions, answered
How long does a solar panel installation take?
Most domestic retrofits are completed within one to two days on site. A straightforward single aspect roof with eight to twelve panels is often a single long day; two roof faces, a battery, or awkward access pushes it into a second. The scaffold bookends that: erected a day or two before the crew arrives, taken down within a week or two after, around two weeks up in total.
Will my electricity go off during the installation?
Briefly, yes. Connecting the new solar circuit into your consumer unit is done with the supply isolated, so there is a short planned power cut, agreed with you on the day rather than sprung on you. Everything else, the roof work and the DC cabling, happens with your house running normally.
Do I need to be at home for the whole installation?
No. You need to be there at the start for the walk through, and for around an hour at the end for commissioning and handover. The hours in between are roof and wiring work that does not need you, provided the crew has access to the loft, the consumer unit and anywhere else agreed in the survey.
When should my MCS certificate arrive?
Within 10 working days of the commissioning date, under the MCS standard the installer is certified against. It is a one page document generated from the MCS installations database, and you need it to register for Smart Export Guarantee payments, so chase it promptly if it has not appeared by the two week mark.
See the numbers next: LONGi 530 W panels, installed, or the solar panels guide.
Durations and scaffold costs are typical ranges from the dated sources above, read 28 August 2026; your own job's timings depend on roof, access and design, and your installation team's method statement governs on the day. Package prices are Clearline's published figures for installations by an MCS-certified installation team for your area.
Sources
- SolarTherm UK, how long does solar panel installation take: most residential systems completed within 1 to 2 days on site, scaffold erected a day or two before, crew typically a roofer and two electricians, testing and commissioning on the day https://solarthermuk.co.uk/solar-knowledge-base/how-long-does-solar-panel-installation-take-in-the-uk
- Spartek, the cost of scaffolding when fitting solar panels: typically GBP 300 to GBP 1,000 plus for a solar job, around 13 per cent of total install cost, scaffold usually up about two weeks around the install https://www.spartek.co.uk/the-cost-of-scaffolding-when-fitting-solar-panels-in-the-uk/
- Sunsave, G98 application guide: connect and notify at 3.68kW per phase or less, installer submits the form to the DNO within 28 days of commissioning https://www.sunsave.energy/solar-panels-advice/planning-permission/g98-application
- Sunsave, G99 application guide: standard DNO determination roughly 4 to 8 weeks; describes installing first with the inverter capped at 3.68kW per phase, with the system uncapped and the export registered only once the DNO approves the G99 https://www.sunsave.energy/solar-panels-advice/planning-permission/g99-application
- Clearline guide, G98 vs G99 explained: above 3.68kW per phase the installer submits a G99 application and the DNO makes a determination before any installation work happens, standard determination roughly four to eight weeks, sources within https://clearlinehomeenergy.co.uk/blog/g98-vs-g99-explained
- MCS, certificate queries: the MCS certificate must be provided to the customer within 10 working days of the commissioning date https://mcscertified.com/consumers/mcs-certificate-queries/
Read next
Are solar panels worth it in 2026? Here is the actual maths
Roughly £1,000 per kWp installed, offsetting electricity at 26.32p a unit. The real arithmetic.
Read the guide →Best solar panels UK 2026: what the datasheets actually say
One pick per job, the specs behind each, and what moves payback more than the badge.
Read the guide →Adding a battery to solar panels you already own
Retrofitting a battery to working solar is straightforward. The paperwork is where people trip up.
Read the guide →